
Note:
- If the version number installed in your device is lower than the version provided in the screenshots, follow the steps below to install the updated version of the applications.
- If an updated version of the above provided applications are already installed in your device, the following instructions will still work with minor differences in the version of the app you’re shown in the output which should have no impact during the course of the bootcamp.
Allow Apps from the App Store and Identified Developers
Reference: https://support.apple.com/en-us/HT202491
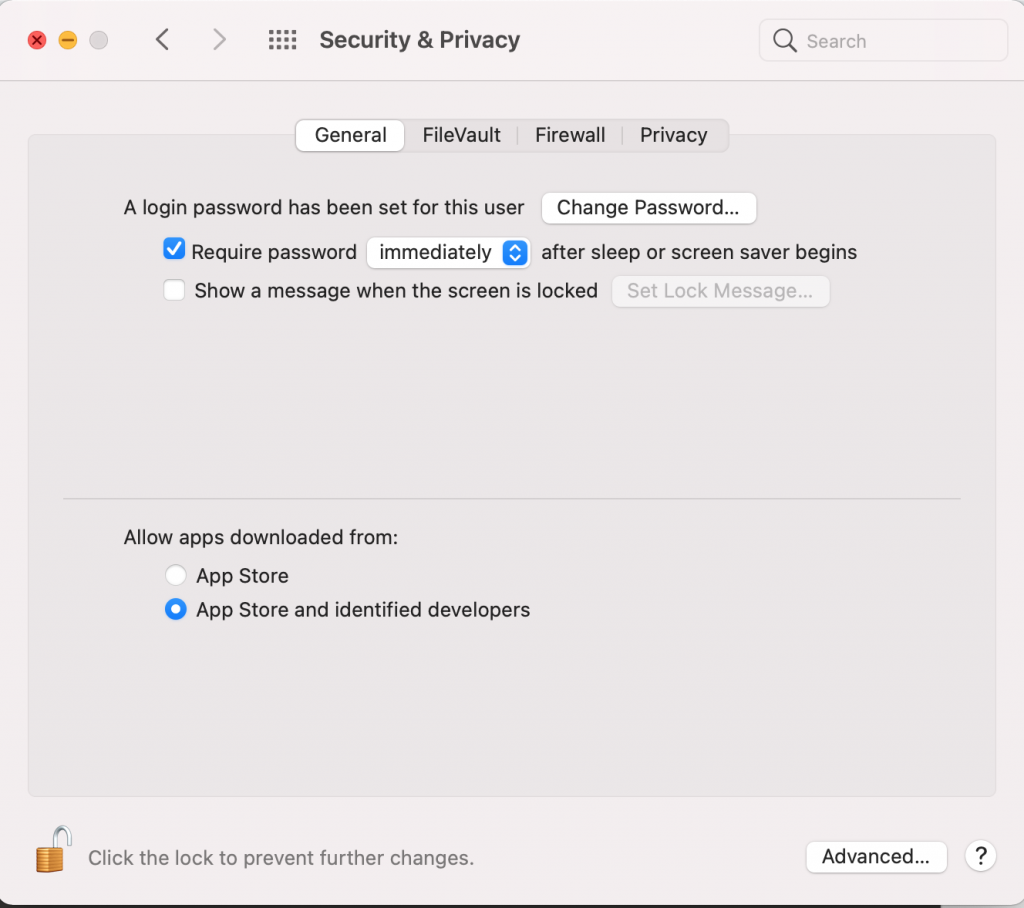
To allow installation from the App Store and Identified Developers on your Mac, choose Apple Menu > System Preferences, click Security & Privacy, then click General.
Click the lock and enter your password to make changes. Select App Store and identified developers under the header “Allow apps downloaded from.”
Homebrew
Click the Spotlight Search located at the top-right of your screen (the magnifying glass icon at the right side of the current time) then search and open a program named Terminal.
Inside the Terminal program, copy-paste the code below then press Enter.
| /bin/bash -c “$(curl -fsSL https://raw.githubusercontent.com/Homebrew/install/master/install.sh)” |
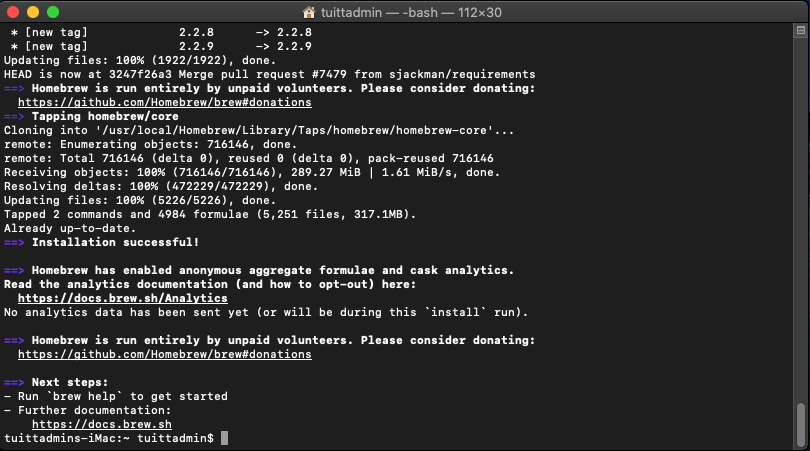
The terminal should now look like this:
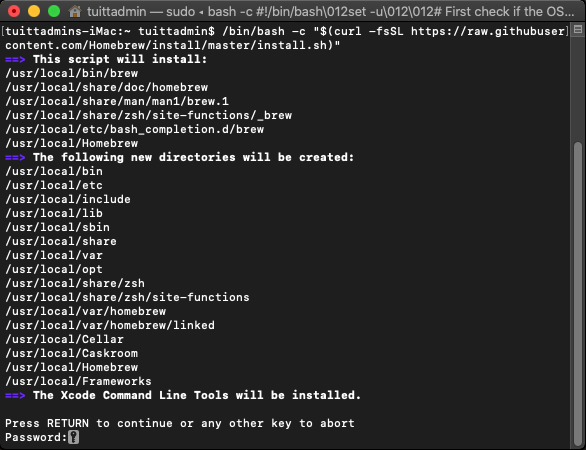
Press Enter and type your password to continue then wait for the install process to finish.
The executed command will install utility tools (specifically for MacOS devices) that will be used in the bootcamp.

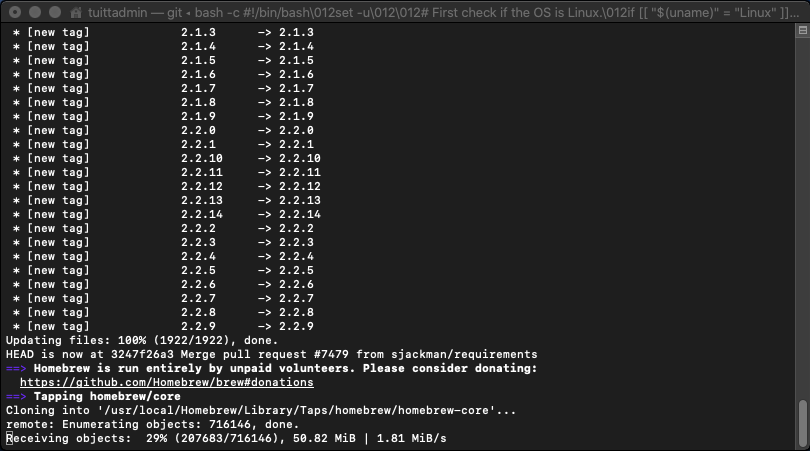
Sample screenshots of the outputs in the Terminal while the command is running.
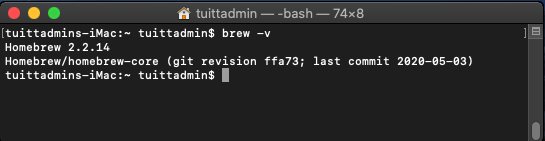
To verify that the installation process is successful, type the following in the Terminal:
| brew -v |
It should output the following:
Git was also installed along the way. To confirm, type git –version and the output should be like this:

If the version number is higher than in the screenshot, it means that it is more updated.
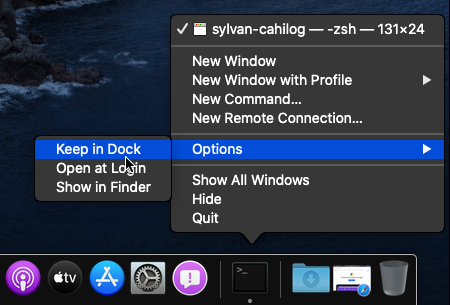
After verifying the success of the install process, keep the Terminal in the dock by right-clicking the program in the dock and choosing the Keep in Dock option.
Google Chrome
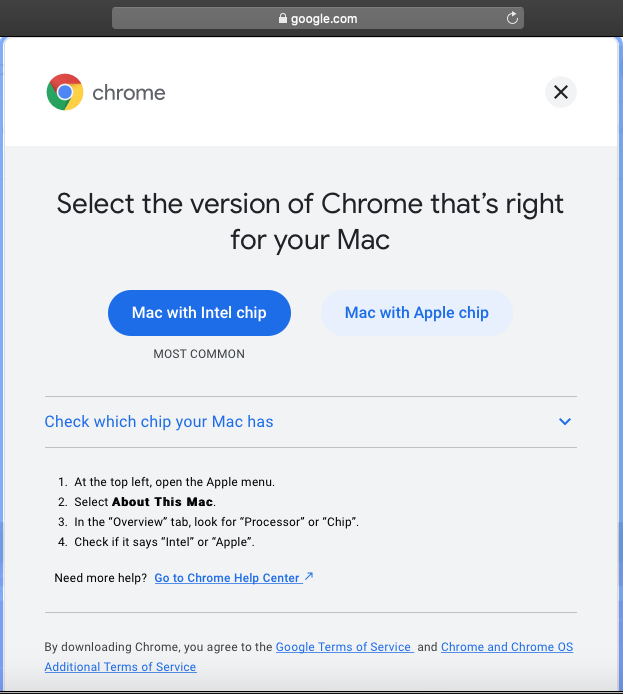
Open a web browser (initially Safari) and go to https://google.com/chrome. On the page, click the Download Chrome button.
Note: If you have an iMac or Macbook with the Apple Silicon (M1 or later) chip, click the Mac with Apple chip button. Otherwise, click the Mac with Intel chip button.

After downloading, open the DMG file.
After opening the DMG file, drag the Google Chrome icon to your Applications.
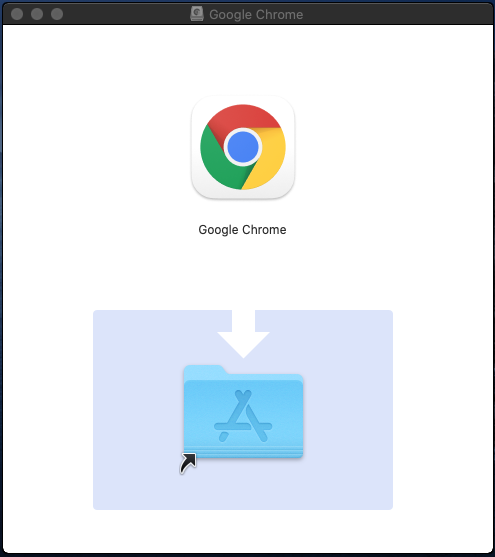
After that, wait for the transfer to finish.

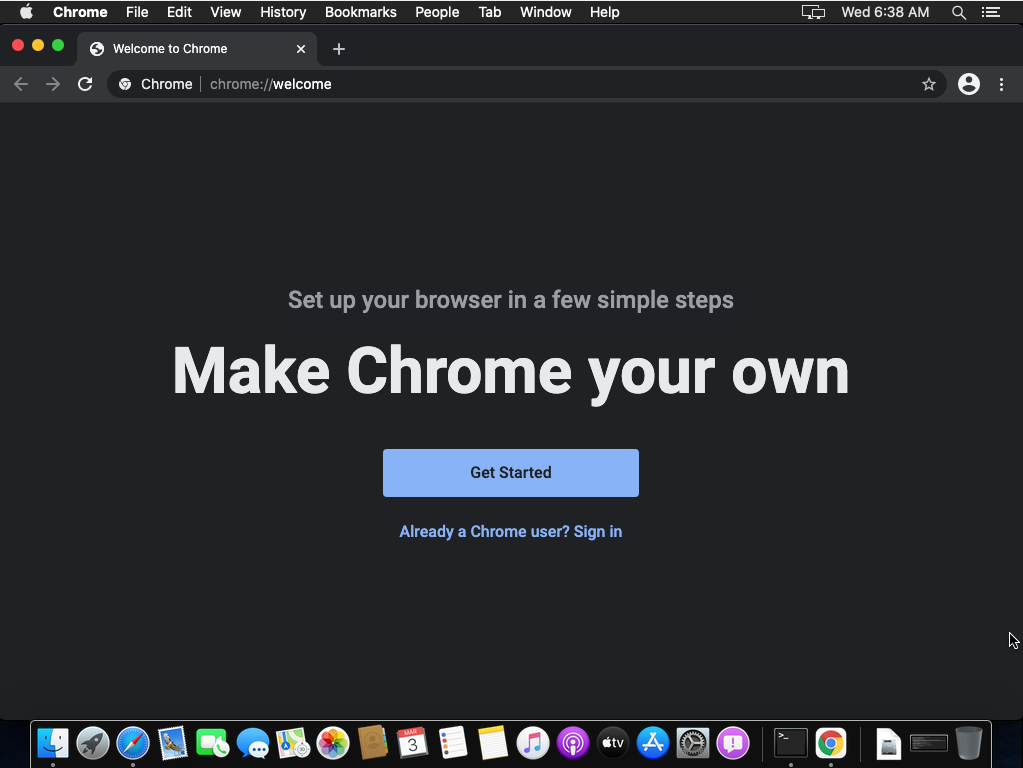
Click the Spotlight Search located at the top-right of your screen (the magnifying glass icon at the right side of the current time) then search and open Google Chrome.
Google Chrome should open normally.
Keep the Google Chrome in the dock by right-clicking the program in the dock and choosing the Keep in Dock option.
Sublime Text 4
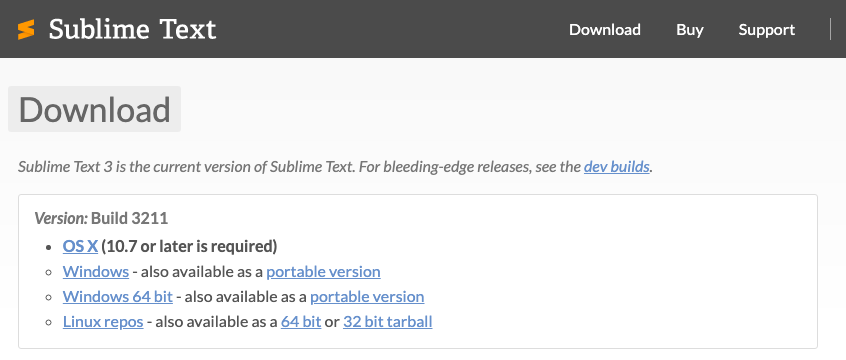
Open a web browser (Safari or Google Chrome) and go to Sublime Text’s Download page. On the page, click the OS X download option.
After downloading, open the ZIP file and drag the Sublime Text icon to your Applications. After that, wait for the transfer to finish.
Click the Spotlight Search located at the top-right of your screen (the magnifying glass icon at the right side of the current time) then search and open Sublime Text.
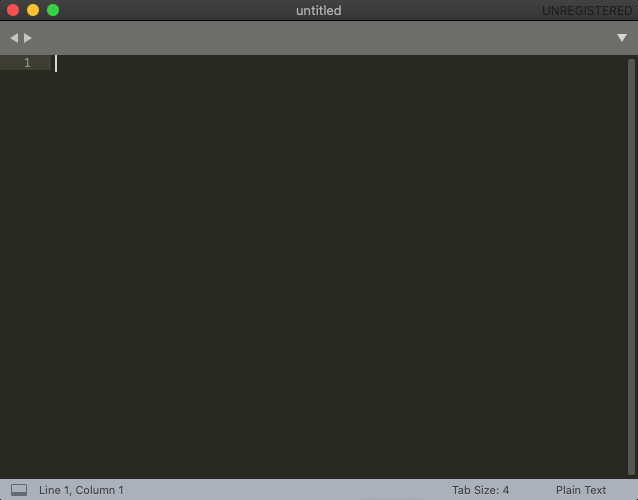
Sublime Text should open normally.
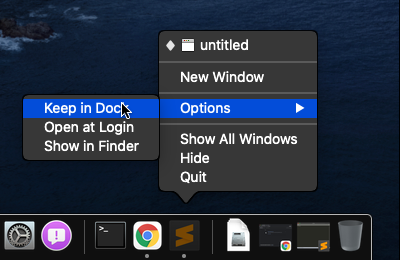
Keep the Sublime Text in the dock by right-clicking the program in the dock and choosing the Keep in Dock option.
Postman
Open a web browser (Safari or Google Chrome) and go to the Download page of Postman. On the page, click the Download the App button.

Open the downloaded ZIP file.

After opening the ZIP file, go to your Downloads folder via Finder and double-click on the Postman.

A prompt will be displayed asking if you want Postman to be moved to the Applications folder. Confirm by clicking the Move to Application Folder button.

Another prompt will be displayed. Click the Ok button.

Finally, wait for the process to finish.

Postman should open normally.

Keep the Postman in the dock by right-clicking the program in the dock and choosing the Keep in Dock option.

Node.js
Open a web browser (Safari or Google Chrome) and go to https://nodejs.org/en/download On the page, click the LTS version download option.
Choose the macOS x64-bit Installer

Go to your Downloads folder

After downloading, open the PKG file then click the Continue button to proceed.

Click the Agree button to proceed.

Then click the Install button to start the installation.

Enter your account password then click the Install Software button.

Wait for the installation to finish.

Click the Spotlight Search located at the top-right of your screen (the magnifying glass icon at the right side of the current time) then search and open a program named Terminal.
Verify the installation by executing node -v. The following output is to be expected:

Additionally, check for the version of NPM by executing npm -v.

If the version number is higher than in the screenshot, it means that it is more updated.
MongoDB Compass
Download MongoDB Compass for your MacOS device. Choose from the following options which one is the best to use. Choose dmg as the package. dmg files are similar to exe files to Windows machines to install applications on a MacOS device.
You may download the installer from the MongoDB website (https://www.mongodb.com/try/download/compass). If the version provided in the screenshots below is different, continue to download the latest version which is typically the default option and install that instead, the steps will be similar as provided below.

In the Finder, execute the installer by double clicking on the file.

Drag and drop the MongoDB Compass icon to the Applications folder to initialize the installation.

Using the Spotlight Search, type MongoDB Compass to open the Application to test if it was installed properly.

Open the MongoDB Compass to check if it works.

MongoDB 6.0 Community Edition
Install MongoDB 6.0 Community Edition using homebrew by following these steps:

Run the MongoDB as a service following these instructions:

Alternatively if these steps do not work. You may refer to the documentation on how to Install MongoDB Community Edition on your device by using this link https://www.mongodb.com/docs/manual/tutorial/install-mongodb-on-os-x/.
Open a terminal and execute the command mongosh to be able to see if it was installed properly. You may press Ctrl + C after to exit out of the mongosh operation.
Session 0: Environment Checks Activity
Diagnostic Script Tool for MCP Mac
Goal: Check if all the software / applications needed are installed in your machines (computer).
Directions: Follow the set of instructions below.
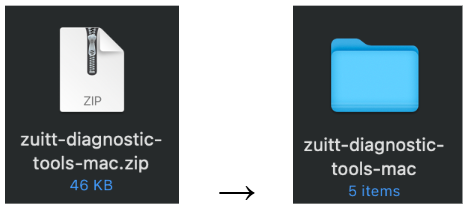
Step 1: Download the zip file here: zuitt-diagnostic-tools-mac.zip
Step 2: Unzip the file: zuitt-diagnostic-tools-mac.zip
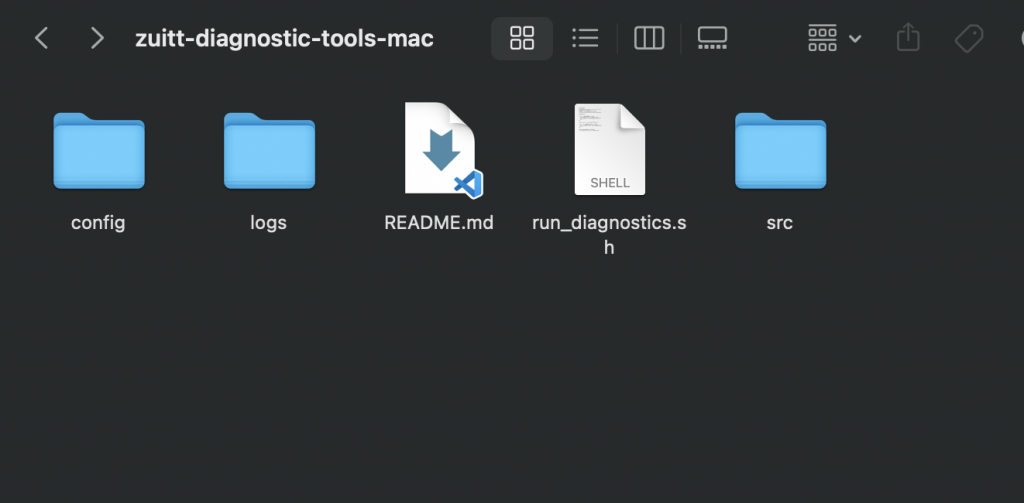
Step 3: Navigate to the zuitt-diagnostic-tools-mac folder
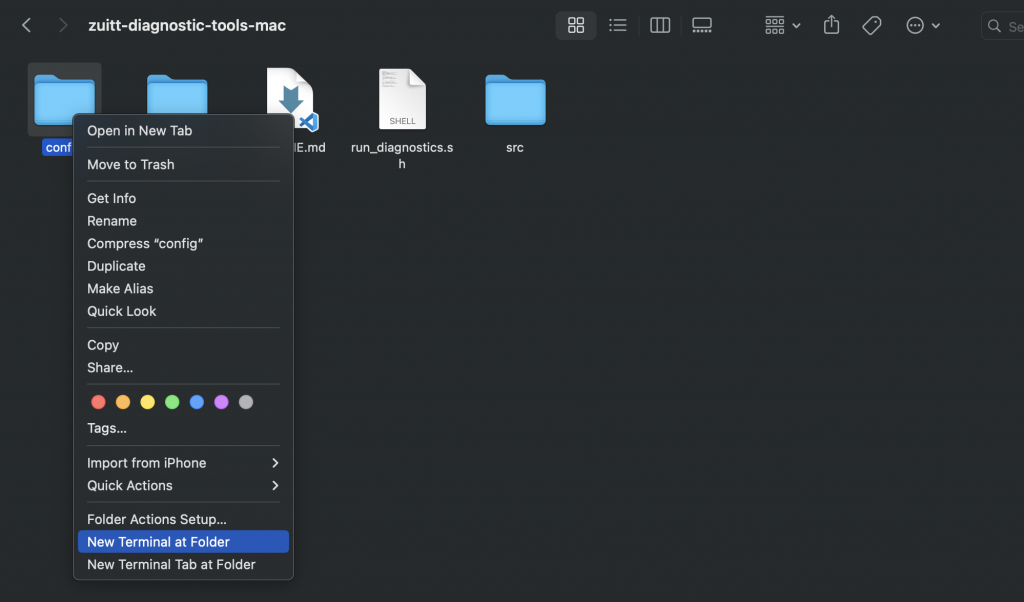
Step 4: Open your terminal
Option A: Inside the zuitt-diagnostic-tools-mac folder, right-click on any folder, then select “New Terminal at Folder.”
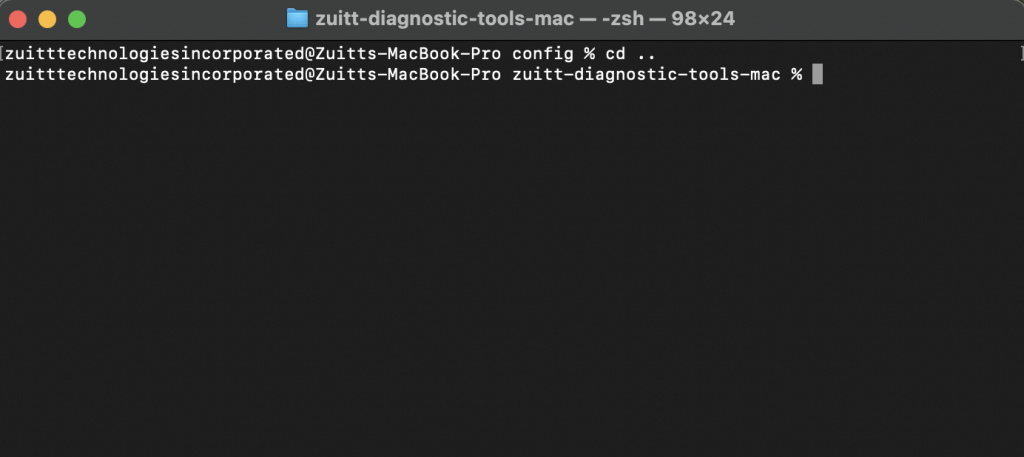
Once the terminal is open, return to the main folder by typing the command:

Option B: Open your terminal

Navigate to the zuitt-diagnostic-tools-mac folder by adding this command:
If the folder is inside the Downloads folder

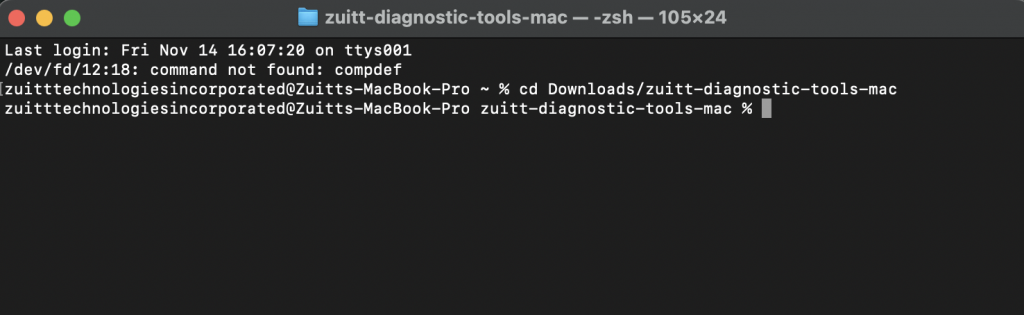
Format of the command:

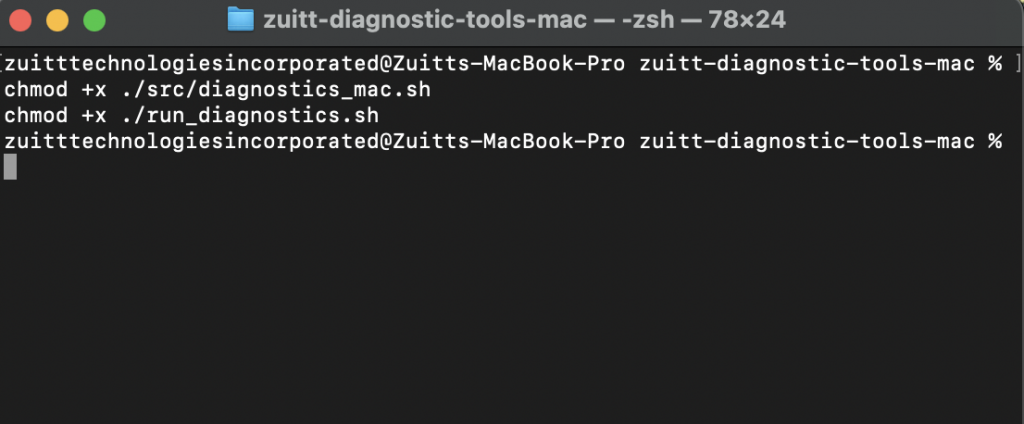
Step 5: Run these commands in the terminal to grant execute permissions

Step 6: You can run diagnostics for MCP by passing it as an argument to the script:

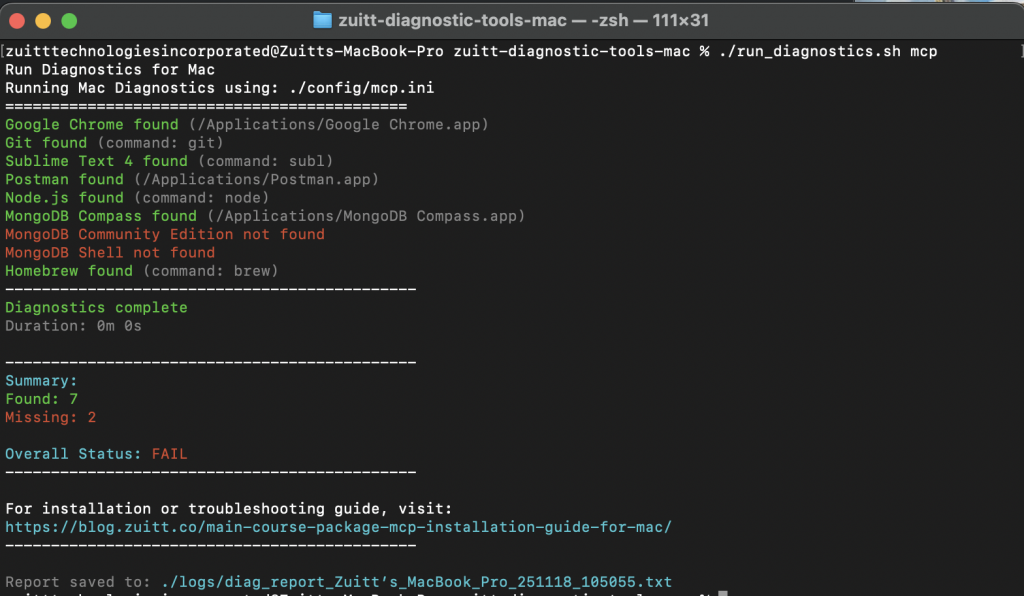
Note: If any applications, tools, or software are missing, install them first, then re-run the command.
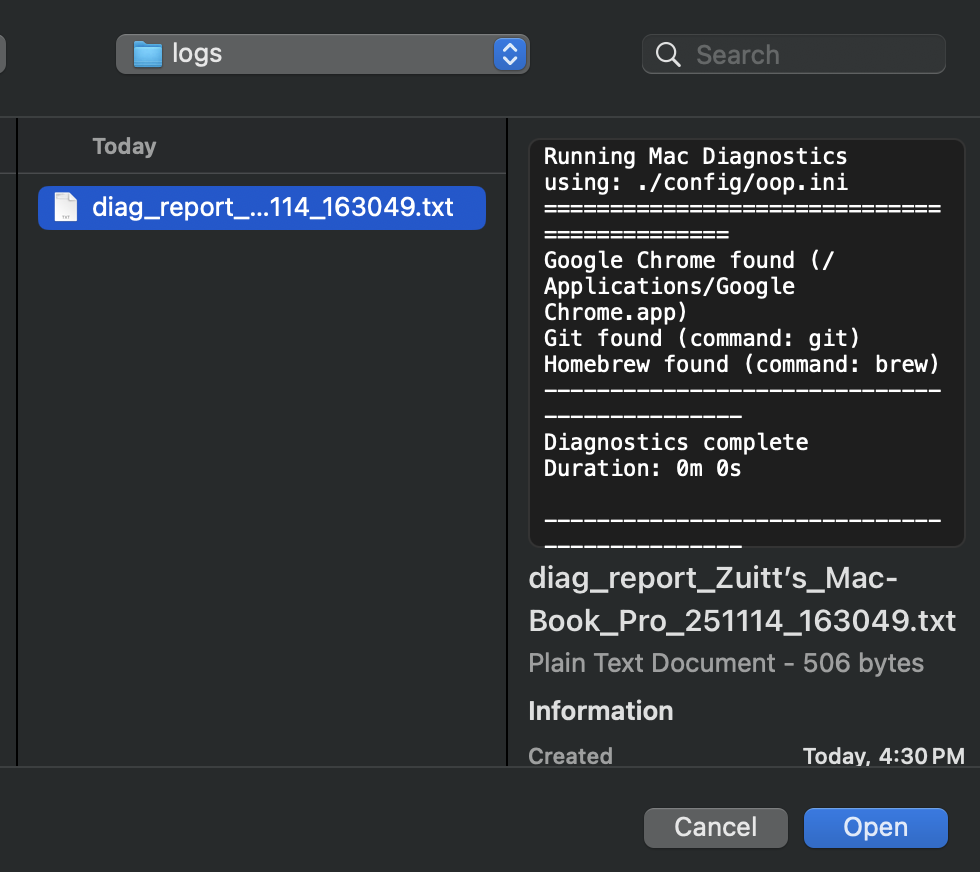
Step 7: After running the diagnostic tool, a text file will be generated inside the logs folder.

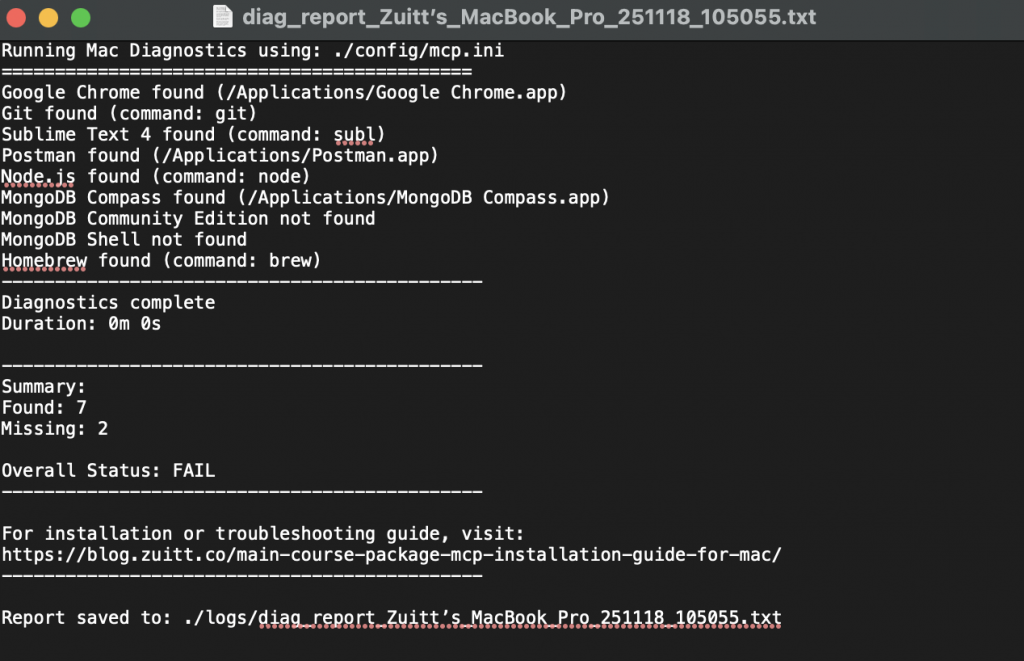
Inside the .txt file
Step 8: Save the .txt file through GDrive. Go to your Google Gdrive and click on the New button in the upper left corner, then select File Upload.

Step 9: Select the diagnostic_report text file. Click Open to begin uploading.
Step 10: Once uploads are complete, right-click on the file and select Share.

Step 11: Set the General Access to Anyone with the Link.
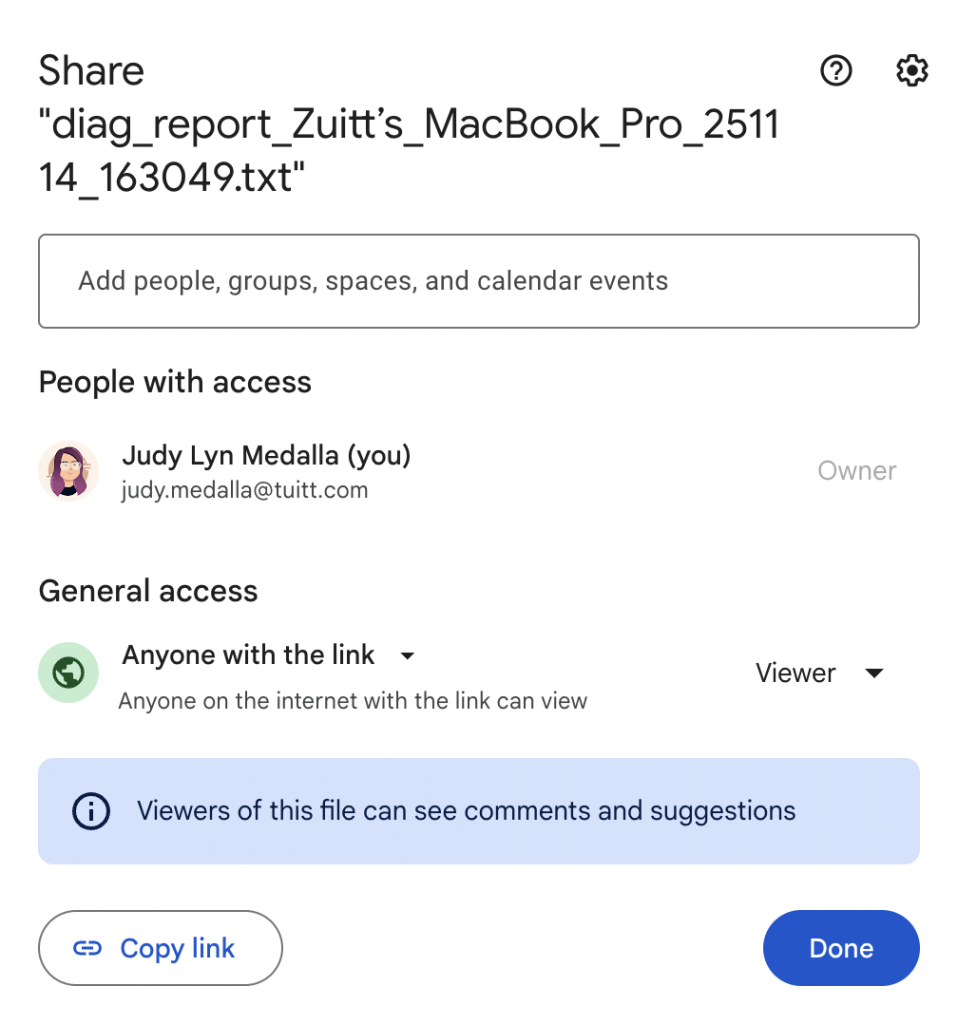
Copy the URL
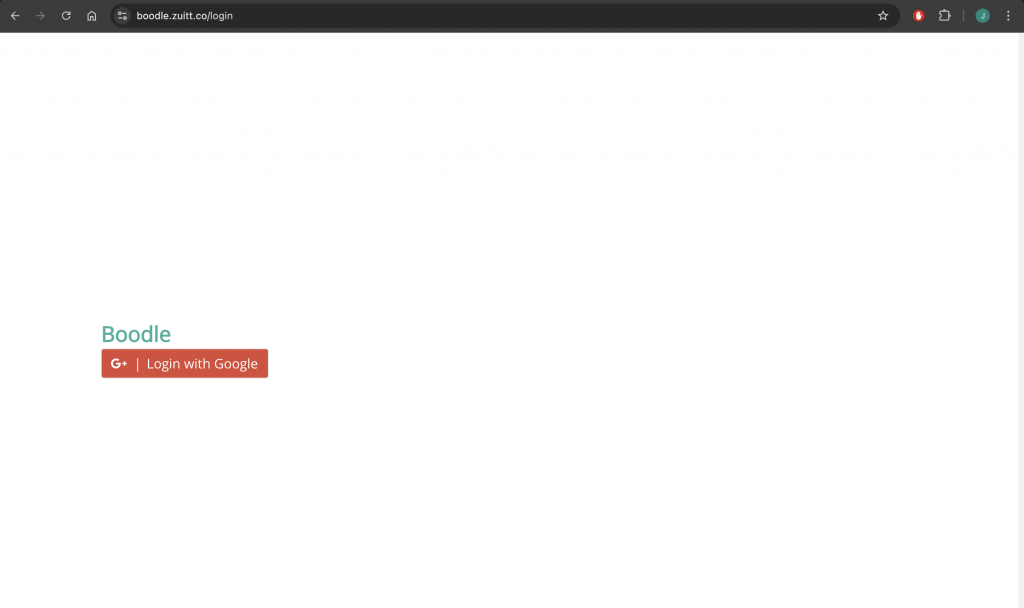
Step 12: Log in to Boodle by clicking on this link (https://boodle.zuitt.co/login/). Make sure you are logged in to the email you provided to Zuitt to access the app.
Step 13: Look for the Add URL button under Bootcamp Introduction and Environment Checks, and click on the button.

Step 14: Upon clicking the button, an input field/box will appear, which will allow you to add a link/URL to the previously copied link from Google Drive. Add the link and click on the check mark button to submit your output.
If you’ve stumbled upon this blog post and aren’t a bootcamper, you can begin your bootcamp journey with Zuitt by clicking this link: