
If the version number installed in your device is lower than the version provided in the screenshots, follow the steps below to install the updated version of the applications.
If an updated version of the above provided applications are already installed in your device, the following instructions will still work with minor differences in the version of the app you’re shown in the output which should have no impact during the course of the bootcamp.
Git
Open a Terminal using Ctrl+Alt+T and execute sudo apt install git -y.
To confirm successful installation, execute git –version to print the current version of installed Git.
Google Chrome
Download and execute the installer.
Wait for the installation to finish and run the google chrome application.

IntelliJ
Open the Software Center and locate the IDEA Community app and click Install found in the upper right corner of the window.

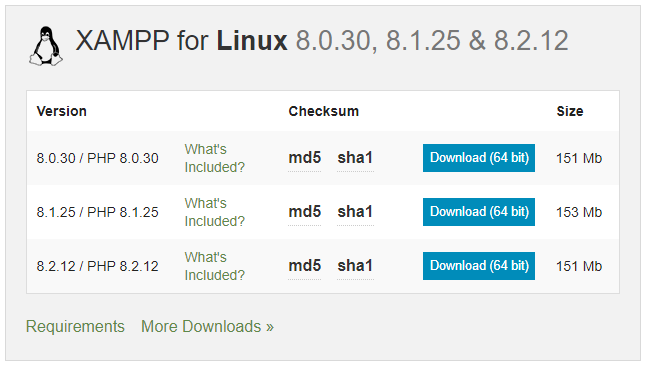
XAMPP
https://www.apachefriends.org/download.html
- Download the v8.1.25 installer
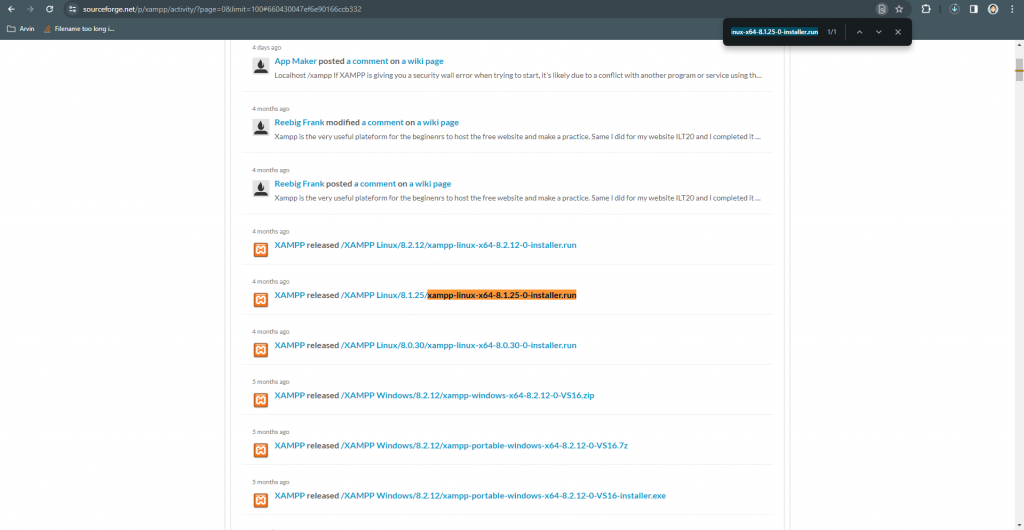
If the link to the installer in the download link section provided above does not work or the same version is not found, you may download the installer here.
The link provided above will redirect you to a list of installers. Press Ctrl + F on your keyboard to open the find in page menu.
Look for the installer (xampp-linux-x64-8.1.25-0-installer.run) with the exact same name as provided in the screenshot above.
Click the link to download the installer.
- In the Downloads directory, you will see this file:
| xampp-linux-x64-8.1.25-0-installer.run |
- Open terminal in the Downloads directory of the installer and input the following command:
| chmod +x xampp-linux-x64-8.1.25-0-installer.run |
The above command makes the downloaded installer executable.
- Next, enter the following command:
| sudo ./xampp-linux-x64-8.1.25-0-installer.run |
Input password when prompted. The installer will now run.
- After installation has finished, input the command:
| sudo ln -s /opt/lampp/bin/php /usr/bin/php |
This will link the php installation to an environment path variable, enabling access to the php command globally.
- Verify installation is working via the command:
| php –version |
You should see the following output:

- Remove the downloaded installer via the command:
| php -r “unlink(‘composer-setup.php’);” |
- You can now start XAMPP via the terminal command:
| sudo /opt/lampp/lampp start |
Input password when prompted. You should see the following output:

- In your browser, input the following URL:
http://localhost/phpmyadmin
You should be able to see the following screen:

If you’ve stumbled upon this blog post and aren’t a bootcamper, you can begin your bootcamp journey with Zuitt by clicking this link: