

Instruction Links
Note:
- If the version number installed in your device is lower than the version provided in the screenshots, follow the steps below to install the updated version of the applications.
- If an updated version of the above provided applications are already installed in your device, the following instructions will still work with minor differences in the version of the app you’re shown in the output which should have no impact during the course of the BootCamp.
Google Chrome
Go to the home page
On the home page, click the Download Chrome button.

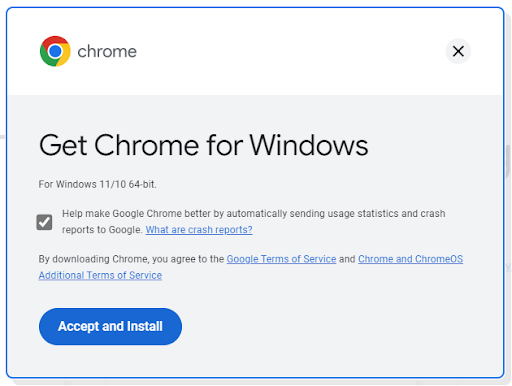
A popup will show, click the Accept and Install button.
You will be prompted to download an installer after that, you can save the installer in your Downloads folder.
Use the installer
Execute the ChromeSetup.exe file that was downloaded earlier.

If the User Account Control dialog shows up, click Yes.

The installer will download the necessary files to actually install Google Chrome.

After the installation, the Google Chrome window will automatically open.

Git
Use the installer
Execute the downloaded installer.

If the User Account Control dialog shows up, click Yes.

Click Next.

Let the destination location be in C:\Program Files\Git and click Next.

Do not change the default selected components and click Next.

Allow the installer to create a Start Menu folder and click Next.

Do not change the default editor to be used by Git and click Next.

Allow Git to be used in command-line and from 3rd party software then click Next.

Do not change the HTTPS transport backend to be used and click Next.

Do not change the default line ending conversion configuration and click Next.

Do not change the default terminal emulator for Git bash and click Next.

Do not change the configuration of extra options and click Install.

Wait for the installer to finish.

Uncheck View Release Notes and click Next to close the installer window.

Verify installation
To verify installation of Git, press Windows Key + R then type cmd to open a command prompt.

Inside the command prompt, type git –version to output the version of the installed program.

NodeJS
Use the installer
Execute the downloaded installer.

Click Next to continue.

Check the checkbox for I accept the terms in the License Agreement and click Next.

Do not change the destination folder and click Next.

Do not change the setup settings and click Next.

Do not check the checkbox shown in Tools for Native Modules and click Next.

Click the Install button to start the installation process.

If the User Account Control dialog shows up, click Yes.

Wait for the installer to finish.

Click Finish to close the installer window.

Additional automatic installation
After the main installation of Node.js, a terminal will appear that asks for any keyboard to continue. After following the instruction from the terminal, a Windows PowerShell program will open. Wait for the additional installation to finish.

Verify installation
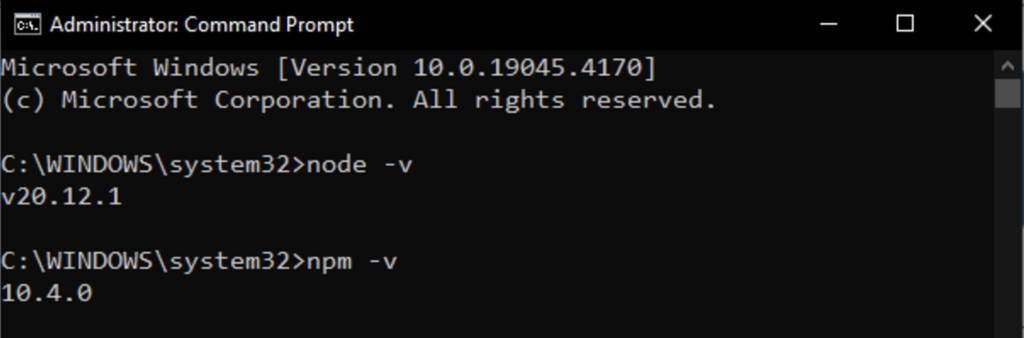
Open a command prompt and type node -v and npm -v to check the version of Node and NPM installed in the machine (You should be able to see the version number of Node you downloaded).
Session 0: Environment Checks Activity
Diagnostic Script Tool for Unit Testing (Windows)
Goal: Verify that all necessary software and applications are installed on your machines (computers).
Directions: Follow the set of instructions below.
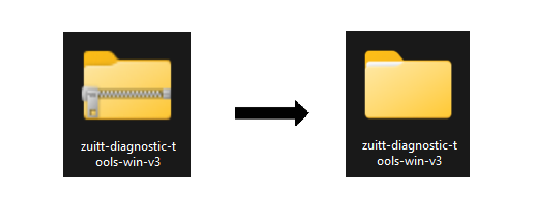
Step 1: Download the zip file here: zuitt-diagnostic-tools-win.zip
Step 2: Unzip the file: zuitt-diagnostic-tools-win-v3.zip
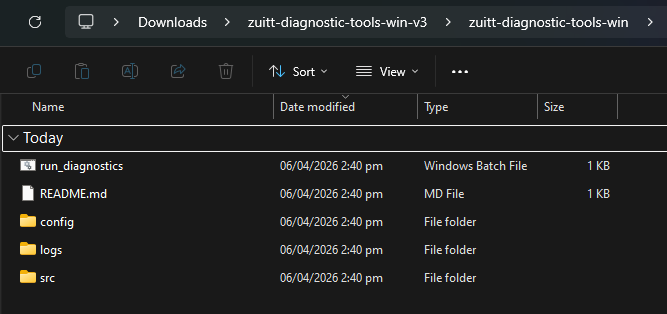
Step 3: Navigate to the zuitt-diagnostic-tools-win folder. All required content should be inside this directory.
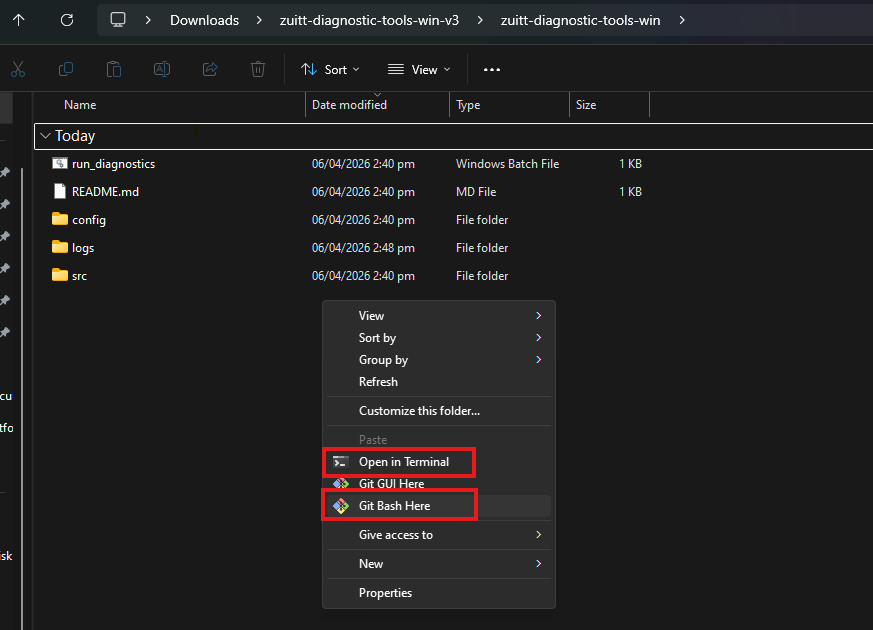
Step 4: Open your Git Bash/Terminal
Note: If Git is already installed, select “Git Bash Here.” Otherwise, choose “Open Terminal”
Step 5: You can run diagnostics for Unit Testing by passing it as an argument to the script:
./run_diagnostics.bat unit_testing
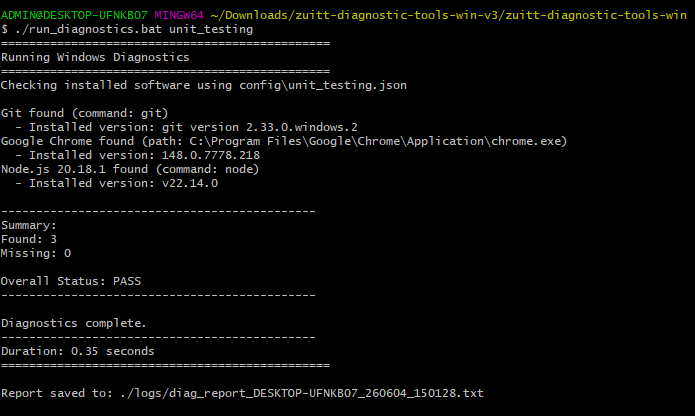
Note: If any applications, tools, or software are missing, install them first, then re-run the command.
Step 6: After running the diagnostic tool, a text file will be generated inside the logs folder.
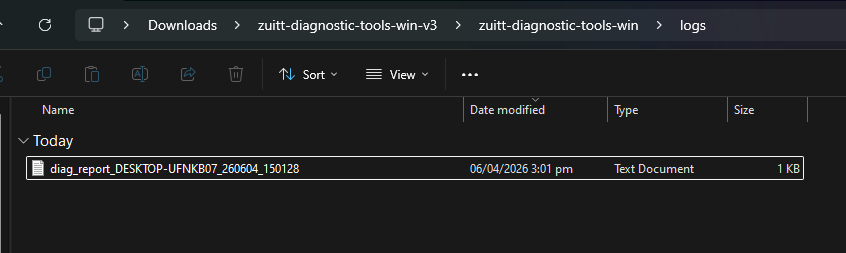
Inside the .txt file

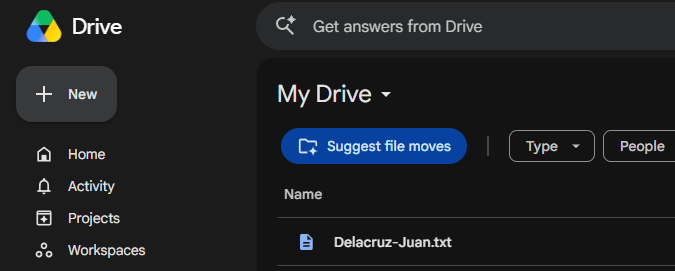
Step 7: Save the .txt file to your Google Drive and rename it using the format <LastName>-<FirstName>.
Example: Delacruz-Juan.txt
Make sure the file’s sharing settings are set to Anyone with the link can view. Then, submit the Google Drive link to your instructor on the first day of your class/session.
If you’ve stumbled upon this blog post and aren’t a bootcamper, you can begin your bootcamp journey with Zuitt by clicking this link: